
개요
이 글은 Building Go Web Application and Microservices Using Gin이라는 제목의 글을 번역한 글로 어색한 번역과 오역이 존재할 수 있습니다.
원문: https://semaphoreci.com/community/tutorials/building-go-web-applications-and-microservices-using-gin
이 튜토리얼에서는, Gin을 사용한 Go 언어로 일반적인 Web Applications과 Microservices를 만드는 법을 배울 것이다. Gin은 일반적으로 이러한 앱을 만들기 위해 사용되는 Boilerplate Code를 줄이는 프레임워크이다. 또한 재사용 가능한 코드를 만드는 데 도움이 된다.
소프트웨어를 구축하기 위한 Architecture이자 하나의 접근 방식으로, Application을 상호 독립적인 최소 구성 요소로 분할한다.
수정하지 않거나 최소한의 수정만을 거쳐 여러 곳에서 필수적으로 사용되는 코드를 말한다.
목표
- Gin을 사용하여 Web Application을 만드는 법을 배운다.
- Go로 작성된 Web Application을 이해한다.
- Semaphore Continuous Integration으로 빠르고 안전하게 Application을 테스트하고 빌드하는 법을 배운다.
반복적인 소프트웨어 개발을 가능하게 하고 결함으로 인한 위험을 줄이며 개발자를 매우 생산적으로 만든다.
준비물
이 튜토리얼을 위해, Go와 Git, curl을 컴퓨터에 설치해야 한다.
이 repository에서 전체 소스를 찾을 수 있다.
노트: curl이 없다면, API Endpoints를 테스트하는 데 주로 사용되는 다른 도구를 사용해도 된다.
Gin이란
Gin은 Web Application과 Microservices를 만드는 데 사용되는 고성능 Micro-Framework이다. 모듈식 재사용 가능한 요청 처리 Pipeline을 간단하게 만들 수 있다. 하나 이상의 요청 핸들러 또는 요청 핸들러 그룹을 연결가능한 Middleware를 작성하여 이 작업을 수행한다.
프로세서에서 성능을 높이기 위해서 명령어 처리 과정으로 명렁어 처리를 여러 단계로 나누어 단계별로 동시에 수행하여 병렬화 시키는 것을 말한다.
왜 Gin인가
Go의 가장 좋은 기능 중 하나는, 쉽게 HTTP 서버를 만들 수 있는
net/http 라이브러리가 내장되어있다. 하지만, 이 라이브러리는 유연하지않고, 구현하기 위해 Boilerplate Code가 필요하다.
Go에는 정규표현식이나 패턴을 기준으로 요청을 처리할 수 있는 내장 라이브러리가 없다. 이 함수를 코드에 추가해야 한다. 하지만, Application의 수가 증가하면, 모든 곳에 코드를 붙여넣거나 재사용하기 위한 라이브러를 만들어야 한다.
이것이 Gin이 제공하는 가장 큰 핵심이다. Boilerplate Code를 줄이고 Web Application을 간단하게 만드는 Routing이나 Middleware, Rendering같은 일반적으로 사용되는 함수들을 포함하고 있다.
특정한 규칙을 가진 문자열의 집합을 표혀하는 데 사용하는 형식 언어이다.
Application 설계
Gin에서 요청이 처리되는 과정을 빠르게 보자. 전형적인 Web Application과 API 서버, Microservices의 제어 흐름은 다음과 같다.
요청이 들어올 때, Gin은 먼저 경로를 분석한다. 만약 일치하는 경로라면, Gin은 경로에 따라 Route Handler와 0개 또는 그 이상의 Middleware를 실행한다. 나중에 코드를 살펴볼 때 어떻게 되는지 볼 수 있다.
Application 기능
우리가 만들 Application은 간단한 게시글 매니저이다. 이 Application은 다음을 수행한다.
- 유저 이름과 비밀번호로 회원가입할 수 있다. (비로그인된 유저만)
- 유저 이름과 비밀번호로 로그인할 수 있다. (비로그인된 유저만)
- 로그아웃을 할 수 있다. (로그인된 유저만)
- 새로운 게시글을 만들 수 있다. (로그인된 유저만)
- 홈페이지에서 모든 게시글의 리스트를 보여준다. (모든 유저에게)
- 각각의 게시글을 보여준다 (모든 유저에게)
이 기능에 추가적으로, 게시글 리스트와 각각의 게시글은 HTML과 JSON, XML로 접근가능해야 한다.
이를 통해 Gin이 어떻게 일반적인 Web Application과 API 서버, Microservices를 설계하는 데 사용되는지 설명할 수 있을 것이다.
이를 위해, 다음과 같은 Gin이 제공하는 함수들을 사용할 것이다.
- Routing - 다양한 URL 처리
- Custom Rendering - 응답 형식 처리
- Middleware - 인증 구현
또한 모든 기능이 정상적으로 작동하는지 검증하기 위한 테스트도 작성할 것이다.
Routing
Routing은 제공되는 모든 현대 Framework의 가장 핵심 기능이다. Web Page나 API
Endpoint는 URL을 통해 접근 할 수 있다. Frameworks는 이러한 URL을 통해 요청한 경로를 처리한다. 만약 URL이
http://www.example.com/some/random/route라면, 경로는 /some/random/route이다.
Gin은 쉽게 설정하고 사용할 수 있는 빠른 Router를 제공한다. 지정된 URL 처리를 제외하고, Gin Routers는 패턴과 그룹화된 URL을 처리할 수 있다.
우리의 Application은 다음을 제공한다.
/경로에 인덱스 페이지를 제공한다. (HTTP GET 요청)
-
/u경로에 사용자 관련 경로 그룹/u/login에서 로그인 페이지를 제공한다. (HTTP GET 요청)
/u/login에서 로그인 기능을 처리한다. (HTTP POST 요청)
/u/logout에서 로그아웃한다. (HTTP GET 요청)
/u/register에서 회원가입 페이지를 제공한다. (HTTP GET 요청)
/u/register에서 회원가입 정보를 처리한다. (HTTP POST 요청)
-
/article경로에 게시글 관련 그룹화- /article/create에서 게시글 생성 페이지를 제공한다. (HTTP GET 요청)
- /article/create에서 제출된 게시글을 처리한다. (HTTP POST 요청)
- /article/view/:article_id에서 게시글 페이지를 제공한다. 이 경로의
:article_id부분을 보자. 시작부분의:은 동적 경로임을 나타낸다. 이 뜻은:article_id는 아무 값이나 포함될 수 있고 Gin은 이 값을 Route Handler에서 사용할 수 있게 처리할 것이다.
Rendering
Web Application은 HTML과 text, JSON, XML 등 다양한 형식의 요청을 만들수 있다. 대표적으로 API Endpoints와 Microservices는 일반적으로 JSON 형식의 데이터를 응답하지만, 다른 형식도 응답할 수 있다.
다음 차례에는 기능을 중복하지 않고 다양한 타입을 응답하는 방법을 알아볼 것이다. 주로 HTML 템플릿을 요청에 응답할 것이고, JSON이나 XML 데이터로 응답할 수 있는 두 개의 Endpoints를 정의할 것이다.
Middleware
Go Web Application에서 Middleware는 HTTP 요청을 처리하는 동안 아무데서나 실행할 수 있는 코드이다. 일반적으로 여러 경로에 적용하려는 공통 기능을 캡슐화하는 데 사용된다. Middleware는 HTTP 요청 전이나 후, 두 곳 다 사용할 수 있다. Middleware의 일반적인 사용은 승인, 검증 등이 있다.
Middleware를 요청 전에 사용했다면, Route Handler에서 바뀐 것을 사용할 수 있는 데, 특정 요청에 대한 검증을 하는 데 유용하다. 반면에, Route Handler 뒤에 사용했다면, Route Handler에서 응답을 가지고 있을 것이고, Middleware는 이 응답을 수정할 수 있다.
Gin은 여러 경로를 처리하면서 공통되는 기능을 구현하는 Middleware를 작성할 수 있게 해준다. 이것은 코드를 적게 작성할 수 있고, 유연하며, 유지보수가 편리하다.
게시글 작성, 로그아웃 같이 몇몇 페이지와 작업들은 반드시 로그인된 유저만 가능하다. 또한 회원가입, 로그인 같이 몇몇 페이지와 작업들은 반드시 로그인이 되지 않은 유저만 가능하다.
모든 경로에 이 기능을 작성한다면, 귀찮고, 반복적이고, 오류가 발생하기 쉽다. 이 작업을 위해 Middleware를 작성하고 특정 경로마다 재사용할 수 있다.
또한, Middleware 작성하면 모든 경로에 적용할 수 있다. 이
Middleware(setUserStatus)는 인증된 유저의 요청인지 아닌지 검사한다. 이 표시를 이용해 몇몇 메뉴 표시를 수정하는 Template을 사용할 수 있다.
의존성 설치
이 Application은 Gin이라는 하나의 외부 의존성만 사용한다. 다음 명령어로 최신 버전을 설치할 수 있다.
go get -u github.com/gin-gonic/gin재사용 가능한 Template 만들기
우리의 Application은 Template을 사용하여 Web Page를 보여준다. Header와 Menu, Sidebar, Footer 등 여러 부분을 모든 페이지에 공통적으로 사용된다. Go는 다른 Template들에 불러 사용할 수 있는 재사용 가능한 Template Snippets을 만들 수 있게 해준다.
Header와 Footer는 모든 Templates에 재사용되는 공통적인 조각이다. 또한, Header
Template에 사용될 Menu를 만들 것이다. 마지막으로 Header와 Footer를 불러와 만들 Index Page를 위한 Template을 만들 것이다. 모든 Template 파일들은
프로젝트 폴더 안 templates 폴더에 위치한다.
templates/menu.html에 Menu를 위한 Template을 다음과
같이 만들어보자.
<!--menu.html-->

		<nav class="navbar navbar-default">
			<div class="container">
				<div class="navbar-header">
					<a class="navbar-brand" href="/">
						Home
					</a>
				</div>
			</div>
		</nav>
처음에 Menu는 Home page의 링크만 포함한다. Application에 더 많은 기능을 만들면 이
곳에 추가된다. 다음과 같은 Header Template은 templates/header.html에 위치한다.
<!--header.html-->

		<!DOCTYPE html>
		<html>
			<head>
				<!--Use the title variable to set the title of the page-->
				<title>{{ .title }}</title>
				<meta name="viewport" content="width=device-width, initial-scale=1">
				<meta charset="UTF-8">

				<!--Use bootstrap to make the application look nice-->
				<link rel="stylesheet" href="https://maxcdn.bootstrapcdn.com/bootstrap/3.3.6/css/bootstrap.min.css" integrity="sha384-1q8mTJOASx8j1Au+a5WDVnPi2lkFfwwEAa8hDDdjZlpLegxhjVME1fgjWPGmkzs7" crossorigin="anonymous">
			<script async src="https://maxcdn.bootstrapcdn.com/bootstrap/3.3.6/js/bootstrap.min.js" integrity="sha384-0mSbJDEHialfmuBBQP6A4Qrprq5OVfW37PRR3j5ELqxss1yVqOtnepnHVP9aJ7xS" crossorigin="anonymous"></script>
			</head>
			<body>
				<!--Embed the menu.html template at this location-->
				{{ template "menu.html" . }}

				<!--footer.html-->
			</body>
		</html>
보다시피, 오픈 소스 부트스트랩 Framework를 사용하고 있다. 파일의 대부분은 표준 HTML이다.
하지만 두 줄을 주목해보자. <title>{{ .title}}</title> 줄은 Application 안에 선언되어야 하는
.title 변수를 사용하여 Page의 Title을 동적으로 설정한다. 두번째로, {{ template "menu.html" . }} 줄은
menu.html에서 Menu Template을 불러와 사용된다. Go에서 하나의 Template을 다른 곳에 불러오는 방법이다.
Footer Template은 정적 HTML을 포함한다. Index Page Template은 Header와 Footer를 사용하여 만들고, Hello Gin이라는 메세지를 표시한다.
<!--index.html>

		<!--Embed the header.html template at this location-->
		{{ template "header.html" . }}

			<h1>Hello Gin!</h1>

		<!--Enbed the footer.html template at this location-->
		{{ template "footer.html" . }}
Index Page Template과 마찬가지로, 다른 페이지의 Template들은 Header와 Footer Template과 비슷한 방식으로 재사용될 것이다.
준비 완료와 검증
Template들을 만든 후, Application의 시작 파일을 만들어야 한다. Index
Template을 사용할 가장 간단하게 만들 수 있는 Web Application을 위한 main.go라는 파일을 생성한다. 4단계로 Gin을 사용할 수 있다.
1. Router 만들기
다음은 Gin으로 Router를 만드는 기본적인 방법이다.
router := gin.Default()이것은 Application을 정의하는 Router를 만든다.
2. Template들 불러오기
Router를 만든 후, 다음과 같이 모든 Template을 불러온다.
router.LoadHTMLGlob("templates/*")이것은 templates에 있는 모든 Template들을 불러온다. 한번 불러오면
Gin Web Application에서 다시 읽지 않아 매우 빠르다.
3. Route Handler 정의하기
Gin의 중심에는 Application을 다양한 경로로 나누고 각각의 경로의 처리하는 방법이 정의되어 있다. Index Page와 Route Handler를 위한 경로를 만든다.
router.GET("/", func(c *gin.Context) {
			// Call the HTML method of the Context to render a template
			c.HTML(
				// Set the HTTP status to 200 (OK)
				http.statusOK,
				// Use the index.html template
				"index.html",
				// Pass the data that the page uses (in this case, 'title')
				gin.H{
					"title": "Home Page",
				},
			)
		})
4. Application 시작하기
Application을 시작하려면, router의 Run Method를 사용해야
한다.
router.Run()기본적으로 localhost:8080에서 실행된다.
완성된 main.go 파일은 다음과 같다.
// main.go

		package main

		import (
		  "net/http"

		  "github.com/gin-gonic/gin"
		)

		var router *gin.Engine

		func main() {

		  // Set the router as the default one provided by Gin
		  router = gin.Default()

		  // Process the templates at the start so that they don't have to be loaded
		  // from the disk again. This makes serving HTML pages very fast.
		  router.LoadHTMLGlob("templates/*")

		  // Define the route for the index page and display the index.html template
		  // To start with, we'll use an inline route handler. Later on, we'll create
		  // standalone functions that will be used as route handlers.
		  router.GET("/", func(c *gin.Context) {

			// Call the HTML method of the Context to render a template
			c.HTML(
			  // Set the HTTP status to 200 (OK)
			  http.StatusOK,
			  // Use the index.html template
			  "index.html",
			  // Pass the data that the page uses (in this case, 'title')
			  gin.H{
				"title": "Home Page",
			  },
			)

		  })

		  // Start serving the application
		  router.Run()

		}
명령어로 Application을 실행하려면, Application의 위치로 이동하고 다음 명령어를 입력한다.
# 원문은 exe이지만 app.exe라고 입력해야 실행 파일이 생성됩니다.
		go build -o app.exe
이 명령어는 Application을 Build하고 다음과 같이 실행가능한
app이라는 파일을 만들어 준다.
# 원문은 슬래시(/)지만 역슬래시(\)로 입력해야 실행됩니다.
		.\app
잘 실행된다면, http://localhost:8080에서 Application에 접근할 수 있고, 다음 화면을 확인할 수 있다.

Application의 파일 구조는 다음과 같아야 한다.
├── main.go
		└── templates
				├── footer.html
				├── header.html
				├── index.html
				└── menu.html
경로 설정
이전에, main.go 파일에서 경로를 만들고 설정해주었다.
Application의 규모가 커진다면, 경로 설정을 한 파일에 옮겨 적는 것이 좋다. 모든 경로를 설정하기 위해 routes.go에
initializeRoutes() 함수를 생성하고 main() 함수에서 호출할 것이다. 코드 자체를 경로 처리기에 넣기보다, 각각의 함수를 정의할
것이다.
이러한 변경을 적용하면 routes.go 파일은 다음과 같다.
// routes.go

		package main

		func initializeRoutes() {

		  // Handle the index route
		  router.GET("/", showIndexPage)
		}
게시글 리스트를 Index Page에 표시할 것이기 때문에, 코드를 수정하고 나서 경로를 추가하지 않아도 된다.
main.go 파일은 다음과 같다.
// main.go

		package main

		import "github.com/gin-gonic/gin"

		var router *gin.Engine

		func main() {

		  // Set the router as the default one provided by Gin
		  router = gin.Default()

		  // Process the templates at the start so that they don't have to be loaded
		  // from the disk again. This makes serving HTML pages very fast.
		  router.LoadHTMLGlob("templates/*")

		  // Initialize the routes
		  initializeRoutes()

		  // Start serving the application
		  router.Run()

		}
게시글 모델 설계
Id와 Title, Content로 이루어진 게시글 타입을 만든다. 다음과 같이 구조를 작성하자.
type article struct {
			ID int `json:"id"`
			Title sting `json:"title"`
			Content string `json:"content"`
		}
대부분의 Application이 데이터를 유지하기 위해 데이터베이스를 사용할 것이다. 하지만 단순하게 하기 위해, 메모리에 게시글을 저장하고, 다음과 같이 hard-coded로 초기화시킬 것이다.
var articleList = []article{
		  article{ID: 1, Title: "Article 1", Content: "Article 1 body"},
		  article{ID: 2, Title: "Article 2", Content: "Article 2 body"},
		}
위의 코드를 models.article.go라는 새로운 파일에 작성하자. 여기에서
모든 게시글을 반환하는 함수를 만들어야 한다. 이 함수의 이름을 getAllArticles()라고 하고 같은 파일에 작성한다. 또한 테스트도 작성할 것이다. 이 테스트의
이름은 TestGetAllArticles이고 models.article_test.go라는 파일에 작성하자.
getAllArticles() 함수에 대한 Unit
Test(TestGetAllArticles)를 먼저 생성하자. Unit Test를 생성하면 models.article_test.go 파일은 다음과
같다.
// models.article_test.go

		package main

		import "testing"

		// Test the function that fetches all articles
		func TestGetAllArticles(t *testing.T) {
		  alist := getAllArticles()

		  // Check that the length of the list of articles returned is the
		  // same as the length of the global variable holding the list
		  if len(alist) != len(articleList) {
			t.Fail()
		  }

		  // Check that each member is identical
		  for i, v := range alist {
			if v.Content != articleList[i].Content ||
			  v.ID != articleList[i].ID ||
			  v.Title != articleList[i].Title {

			  t.Fail()
			  break
			}
		  }
		}
이 Unit Test는 모든 게시글을 불러오기위해 getAllArticles() 함수를 사용한다. 이 테스트는 먼저 가져온 게시글 리스트와 전역 변수 게시글 리스트의 길이가 동일한지 확인한다. 그런 다음, 각 게시글이 동일한지 확인하기 위해 반복문을 사용한다. 이 두가지 중 어느 것이라도 맞지 않다면 테스트는 실패한다.
테스트를 작성을 했고, 이제 실제 코드를 작성하자.
models.article.go 파일은 다음과 같다.
// models.article.go

		package main

		type article struct {
		  ID      int    json:"id"
		  Title   string json:"title"
		  Content string json:"content"
		}

		// For this demo, we're storing the article list in memory
		// In a real application, this list will most likely be fetched
		// from a database or from static files
		var articleList = []article{
		  article{ID: 1, Title: "Article 1", Content: "Article 1 body"},
		  article{ID: 2, Title: "Article 2", Content: "Article 2 body"},
		}

		// Return a list of all the articles
		func getAllArticles() []article {
		  return articleList
		}
View Template 만들기
게시글 목록이 Index Page에 표시되기 떄문에, 새로운 Template을 생성할 필요가 없다. 하지만, index.html의 내용을 게시글 리스트로 바꾸기 위해 코드를 변경해야 한다.
게시글 리스트를 표시하기 위해, payload라는 변수에 담아 Template으로 전송할 것이다. 다음은 게시글 리스트를 표시하는 코드이다.
{{range .payload }}
			<!--Create the link for the article based on its ID-->
			<a href="/article/view/{{.ID}}">
			  <!--Display the title of the article -->
			  <h2>{{.Title}}</h2>
			</a>
			<!--Display the content of the article-->
			<p>{{.Content}}</p>
		  {{end}}
이 코드는 payload에 있는 모든 항목을 돌아 각 게시글의
title과 content를 표시한다. 또한 각 게시글로 Link되어 있다. 하지만, 각각의 게시글을 표시하기 위한 Route Handlers를
아직 정의하지 않았기 떄문에, 이 Link는 예상대로 작동하지 않는다.
다음과 같이 index.html을 수정하자.
<!--index.html-->

		<!--Embed the header.html template at this location-->
		{{ template "header.html" .}}

		  <!--Loop over the payload variable, which is the list of articles-->
		  {{range .payload }}
			<!--Create the link for the article based on its ID-->
			<a href="/article/view/{{.ID}}">
			  <!--Display the title of the article -->
			  <h2>{{.Title}}</h2>
			</a>
			<!--Display the content of the article-->
			<p>{{.Content}}</p>
		  {{end}}

		<!--Embed the footer.html template at this location-->
		{{ template "footer.html" .}}
Unit Test로 Route Handler를 위한 요구 사항 지정
Index Route를 위한 Handler를 만들기 전에, Route Handler의 예상 동작을 정의하기 위한 테스트를 만들 것이다.
- Handler가 HTTP 상태 코드 200으로 응답한다.
- 반환된 HTML은
Home Page가 들어있는 title 태그를 포함한다.
이 테스트를 위한 코드는 Handlers.article_test.go 파일 안
TestShowIndexPageUnauthenticated 함수에 작성한다. 이 함수가 사용하는 helper 함수를 common_test,.go에
작성한다.
handlers.article_test.go는 다음과 같다.
// handlers.article_test.go

		package main

		import (
		  "io/ioutil"
		  "net/http"
		  "net/http/httptest"
		  "strings"
		  "testing"
		)

		// Test that a GET request to the home page returns the home page with
		// the HTTP code 200 for an unauthenticated user
		func TestShowIndexPageUnauthenticated(t *testing.T) {
		  r := getRouter(true)

		  r.GET("/", showIndexPage)

		  // Create a request to send to the above route
		  req, _ := http.NewRequest("GET", "/", nil)

		  testHTTPResponse(t, r, req, func(w *httptest.ResponseRecorder) bool {
			// Test that the http status code is 200
			statusOK := w.Code == http.StatusOK

			// Test that the page title is "Home Page"
			// You can carry out a lot more detailed tests using libraries that can
			// parse and process HTML pages
			p, err := ioutil.ReadAll(w.Body)
			pageOK := err == nil && strings.Index(string(p), "<title>Home Page</title>") > 0

			return statusOK && pageOK
		  })
}common_test.go는 다음과 같다.
package main

		import (
		  "net/http"
		  "net/http/httptest"
		  "os"
		  "testing"

		  "github.com/gin-gonic/gin"
		)

		var tmpArticleList []article

		// This function is used for setup before executing the test functions
		func TestMain(m *testing.M) {
		  //Set Gin to Test Mode
		  gin.SetMode(gin.TestMode)

		  // Run the other tests
		  os.Exit(m.Run())
		}

		// Helper function to create a router during testing
		func getRouter(withTemplates bool) *gin.Engine {
		  r := gin.Default()
		  if withTemplates {
			r.LoadHTMLGlob("templates/*")
		  }
		  return r
		}

		// Helper function to process a request and test its response
		func testHTTPResponse(t *testing.T, r *gin.Engine, req *http.Request, f func(w *httptest.ResponseRecorder) bool) {

		  // Create a response recorder
		  w := httptest.NewRecorder()

		  // Create the service and process the above request.
		  r.ServeHTTP(w, req)

		  if !f(w) {
			t.Fail()
		  }
		}

		// This function is used to store the main lists into the temporary one
		// for testing
		func saveLists() {
		  tmpArticleList = articleList
		}

		// This function is used to restore the main lists from the temporary one
		func restoreLists() {
		  articleList = tmpArticleList
		}
테스트를 구현하기 위해, 몇 가지 helper 함수들을 작성했다. 이 함수는 또한 유사한 함수를 테스트하기 위해 추가되는 테스트를 작성할 때 Bolierplate Code를 줄이는 데 도움을 준다.
TestMain 함수는 Gin이 테스트 모드를 사용하게 설정하고 나머지 테스트
함수를 호출한다. getRouter 함수는 이 Application과 유사한 방식으로 라우터를 생성하고 반환한다. saveLists() 함수는 원본
게시글 리스트를 임시 변수에 저장한다. Unit Test를 실행한 후 restoreLists()에서 게시글 리스트를 초기 상태로 만들기 위해 사용된다.
마지막으로, testHTTPResposne 함수는 Boolean 값을 반환하는지
확인하기 위해 전달된 함수를 실행하며 테스트 성공 여부를 나타낸다. 이 함수는 HTTP 요청의 응답을 테스트하는 데 필요한 코드를 복제하지 않도록 도와준다.
HTTP코드와 HTML을 반환했는지 확인하기 위해 다음을 수행하자.
- 새 Router 만들기
- 기본 앱에서 사용하는 것과 같은 Handler(
showIndexPage)를 사용할 경로 정의
- 경로에 접근하기 위한 새로운 요청 만들기
- HTTP 코드와 HTML을 응답하기 위한 함수 만들기
- 테스트를하기 위해 새로운 함수와
testHTTPResponse()호출
Route Handler 만들기
handlers.article.go 파일에 게시글 관련 기능을 위한 Route
Handlers를 만들 것이다. Index Page를 위한 Handler, showIndexPage는 다음과 같은 작업을 한다.
1. 게시글 리스트 불러오기
이전에 정의한 getAllArticles를 사용하여 수행할 수 있다.
articles := getAllArticles()2. 게시글 리스트를 전달한 index.html 출력
다음과 같은 코드로 수행할 수 있다.
c.HTML(
			// Set the HTTP status to 200 (OK)
			http.StatusOK,
			// Use the index.html template
			"index.html",
			// Pass the data that the page uses
			gin.H{
				"title":   "Home Page",
				"payload": articles,
			},
		)
이전에 만든 것과 다른 점은 Template에서 접근할 게시글 리스트를
payload라는 변수로 전달한다는 것이다.
andlers.article.go 파일은 다음과 같다.
// handlers.article.go

		package main

		import (
		  "net/http"

		  "github.com/gin-gonic/gin"
		)

		func showIndexPage(c *gin.Context) {
		  articles := getAllArticles()

		  // Call the HTML method of the Context to render a template
		  c.HTML(
			// Set the HTTP status to 200 (OK)
			http.StatusOK,
			// Use the index.html template
			"index.html",
			// Pass the data that the page uses
			gin.H{
			  "title":   "Home Page",
			  "payload": articles,
			},
		  )

		}
이제 Application을 Build하고 실행하면 http://localhost:8080에서 다음과 같은 화면을 볼 수 있다.
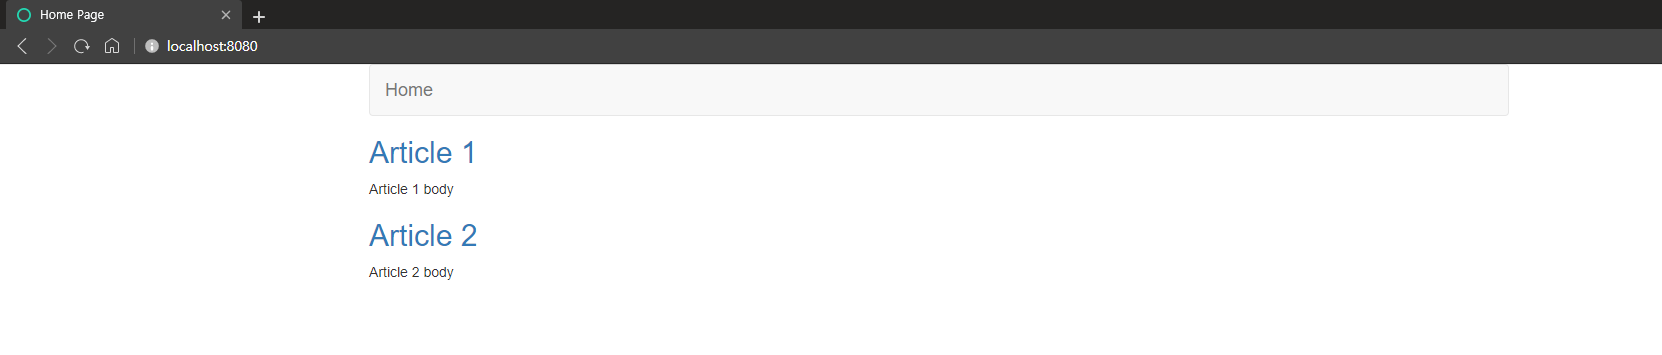
이 문단에서 새로 추가된 파일들이다.
├── common_test.go
		├── handlers.article.go
		├── handlers.article_test.go
		├── models.article.go
		├── models.article_test.go
		└── routes.go
하나의 게시글 표시하기
이전에 표시한 게시글 리스트를 클릭했을 때 Link가 작동하지 않았다. 이번에 handlers를 추가하고 하나의 게시글을 표시할 것이다.
경로 설정
이전 경로처럼 같은 방식으로 각각의 게시글을 위한 요청을 다루는 새로운 경로를 설정할 것이다. 하지만,
기사를 처리하는 방식은 같지만 URL은 서로 다르다. 다음과 같이 Gin에서 URL Parameter를 사용함으로 조건을 만족시킬 수 있다.
router.GET("/article/view/:article_id", getArticle)이 경로는 Route Handler에서 article_id라는 변수에 마지막
부분의 값을 저장한다. 이 경로를 위해 getArticle이라는 Handler를 정의해야한다.
routes.go 파일은 다음과 같다.
// routes.go

		package main

		func initializeRoutes() {
			// Handle the index route
			router.GET("/", showIndexPage)

			// Handle GET requests at /article/view/some_article_id
			router.GET("/article/view/:aritlce_id", getArticle)
		}
View Template 만들기
각각의 게시글을 출력하기 위해 templates/article.html에 새로운
template를 만들어야 한다. index.html과 비슷한 방식으로 만들 수 있다. 하지만, 게시글 리스트를 가지고 있는
payload 변수 대신에, 여기에서는 하나의 게시글을 담을 것이다.
article.html은 다음과 같다.
<!--article.html-->

		<!--Embed the header.html template at this location-->
		{{ template "header.html" .}}

		<!--Display the title of the article-->
		<h1>{{.payload.Title}}</h1>

		<!--Display the content of the article-->
		<p>{{.payload.Content}}</p>

		<!--Embed the footer.html template at this location-->
		{{ template "footer.html" .}}
Unit Test로 Route Handler를 위한 요구 사항 지정
이 테스트는 전에 만든 경로의 Handler가 다음과 같은 조건을 따르는지 확인한다.
- Handler가 HTTP 상태 코드 200으로 응답한다.
- 반환된 HTML은 불러온 게시글의 제목을 포함한 title 태그를 가진다.
테스트를 위한 코드는 handlers.article_test.go 파일 안의
TestArticleUnauthenticated 함수에 작성한다. common_test.go 파일에 이 기능이 사용하는 helper 함수를
작성한다.
Route Handler 만들기
게시글 페이지를 위한 Handler인 getArticle은 다음과 같은 작업을
수행한다.
1. 표시할 게시글의 ID 추출
불러와 표시할 게시글을 위해, 먼저 context에서 ID를 추출해야한다. 다음과
같이 추출할 수 있다.
c.Param("article_id")여기서 c는 Gin을 사용할 때 모든 Route Handler에 대한 변수인 Gin Context이다.
2. 게시글 불러오기
models.article.go에 정의된
getArticleID() 함수를 사용하면 된다.
article, err := getArticleByID(articleID)models.article.go 안의
getArticleByID 함수는 다음과 같다.
func getArticleByID(id int) (*article, error) {
			for _, a := range articleList {
				if a.ID == id {
					return &a, nil
				}
			}

			return nil, errors.New("Article not found")
		}
이 함수는 게시글 리스트를 반복하면서 ID가 맞는 게시글을 반환한다. 맞는 게시글이 없다면 맞는 게시글이 없다는 에러를 반환한다.
3. 게시글을 전달한 article.html 보여주기
다음과 같은 코드를 작성하면 된다.
c.HTML(
			// Set the HTTP status to 200 (OK)
			http.statusOK,
			// Use the article.html tempalte
			"article.html",
			// Pass the data that the page uses
			gin.H{
				"title": article.Title,
				"payload": article,
			},
		)
업데이트된 handlers.article.go 파일은 다음과 같은 코드를
포함한다.
// handlers.article.go

		package main

		import (
		  "net/http"
		  "strconv"

		  "github.com/gin-gonic/gin"
		)

		func showIndexPage(c *gin.Context) {
		  articles := getAllArticles()

		  // Call the HTML method of the Context to render a template
		  c.HTML(
			// Set the HTTP status to 200 (OK)
			http.StatusOK,
			// Use the index.html template
			"index.html",
			// Pass the data that the page uses
			gin.H{
			  "title":   "Home Page",
			  "payload": articles,
			},
		  )

		}

		func getArticle(c *gin.Context) {
		  // Check if the article ID is valid
		  if articleID, err := strconv.Atoi(c.Param("article_id")); err == nil {
			// Check if the article exists
			if article, err := getArticleByID(articleID); err == nil {
			  // Call the HTML method of the Context to render a template
			  c.HTML(
				// Set the HTTP status to 200 (OK)
				http.StatusOK,
				// Use the index.html template
				"article.html",
				// Pass the data that the page uses
				gin.H{
				  "title":   article.Title,
				  "payload": article,
				},
			  )

			} else {
			  // If the article is not found, abort with an error
			  c.AbortWithError(http.StatusNotFound, err)
			}

		  } else {
			// If an invalid article ID is specified in the URL, abort with an error
			c.AbortWithStatus(http.StatusNotFound)
		  }
		}
이제 빌드하고 실행하면 http://localhost:8080/article/view/1에서 다음과 같은 화면을 볼 수 있다.

이번에 새로 추가된 파일은 다음과 같다.
└── templates
			└── article.html
JSON/XML로 응답
이번에는 Request Header에 따라 HTML, JSON 또는 XML 형식으로 응답할 수 있게 코드를 수정할 것이다.
재사용 가능한 함수 만들기
지금까지 우리는 Gin Context의 HTML 메소드를 사용하여 Route
Handler에서 직접 보여줬다. 이것은 HTML만 보여주려면 괜찮다. 하지만, Request를 기반으로 응답의 형식을 바꾸고 싶다면,
Rendering을 관리하는 단일 함수로 코드를 수정하야 한다. 이렇게 하면, Route Handler가 검증과 데이터를 가져오는데에 집중할 수 있게 만들 수 있다
Route Handler는 원하는 응답 형식에 관계없이 같은 종류의 유효성 검사, 데이터 불러오기 및 데이터 처리를 수행해야 한다. 이 부분이 끝나면, 데이터를 원하는 형식으로 응답을 만들 수 있다. HTML로 응답하길 원한다면, HTML template을 보내고 페이지를 만든다. JSON 응답을 원한다면 데이터를 JSON으로 바꾸고 보낸다. XML도 마찬가지이다.
main.go에 모든 Route Handler에서 사용할
render 함수를 만들 것이다. 이 함수는 Request의 Accept 헤더를 기반으로 알맞은 형식을 보여줄 수 있게
관리한다.
Gin에서 Route Handler는 Request라는
Field를 포함하는 Context를 보낸다. 이 Field는 모든 요청 헤더를 포함한 Header를 가지고
있다. 다음과 같이 Header의 Get 메소드를 사용하여 Accept 헤더를 추출할 수 있다.
// c is the Gin Context
c.Request.Header.Get("Accept")- 만약 application/json으로 설정되어 있다면, 함수는 JSON을 보여준다.
- 만약 application/xml로 설정되어 있다면, 함수는 XML을 보여준다.
- 만약 다른 것으로 설정되어 있거나 비었다면, HTML을 보여준다.
클래스에 포함된 변수
다음과 같이 render 함수를 완성하세요.
// Render one of HTML, JSON or CSV based on the 'Accept' header of the request
		// If the header doesn't specify this, HTML is rendered, provided that
		// the template name is present
		func render(c *gin.Context, data gin.H, templateName string) {

		  switch c.Request.Header.Get("Accept") {
		  case "application/json":
			// Respond with JSON
			c.JSON(http.StatusOK, data["payload"])
		  case "application/xml":
			// Respond with XML
			c.XML(http.StatusOK, data["payload"])
		  default:
			// Respond with HTML
			c.HTML(http.StatusOK, templateName, data)
		  }
		}
Unit Test로 Route Handler의 요구 사항 수정
각 헤더가 설정되면 JSON과 XML 응답을 예상할 수 있기 때문에, 이러한 조건을 테스트하기 위해
handlers.article_test.go 파일에 테스트를 추가해야한다. 다음을 추가한다.
Accept헤더가application/json으로 설정되어 있을 때, 게시글 리스트를 JSON으로 반환하는지 테스트
Accept헤더가application/xml으로 설정되어 있을 때, 게시글을 XML 형식으로 반환하는지 테스트
TestArticleListJSON과
TestArticleXML이라는 함수로 추가할 것이다.
Route Handler 업데이트
어떤 형식으로든 Rendering하는 로직이 거의 같기 떄문에 Route
Handler는 실제로 크게 변경할 필요가 없다. c.HTML 메소드를 사용하여 Rendering하는 대신 render
함수를 사용하면 된다.
예를 들어, showIndexPage Route Handler는 다음과 같이
바뀐다.
// From

		func showIndexPage(c *gin.Context) {
		  articles := getAllArticles()

		  // Call the HTML method of the Context to render a template
		  c.HTML(
			// Set the HTTP status to 200 (OK)
			http.StatusOK,
			// Use the index.html template
			"index.html",
			// Pass the data that the page uses
			gin.H{
			  "title":   "Home Page",
			  "payload": articles,
			},
		  )

		}
// To
func showIndexPage(c *gin.Context) {
articles := getAllArticles()
// Call the render function with the name of the template to render
render(c, gin.H{
"title": "Home Page",
"payload": articles}, "index.html")
}JSON 형식의 게시글 리스트 검색
마지막으로 업데이트한 것을 보기 위해, 빌드하고 실행한다. 그리고 다음 명령어를 실행하자.
curl -X GET -H "Accept: application/json" http://localhost:8080다음과 같이 응답된다.
[{"id":1,"title":"Article 1","content":"Article 1 body"},{"id":2,"title":"Article 2","content":"Article 2 body"}]여기서 볼 수 있듯이, Accept 헤더를
application/json으로 설정해놓았기 때문에 우리의 요청이 JSON 형식으로 응답받았다.
XML 형식의 게시글 리스트 검색
이번엔 XML 형식으로 특정 게시글의 세부 정보를 응답하도록 하자. 이 일을 위해, 먼저, 위에서 언급한 대로 실행을 한다. 그리고 다음 명령어를 실행한다.
curl -X GET -H "Accept: application/json" http://localhost:8080/article/view/1다음과 같이 응답된다.
<article><ID>1</ID><Title>Article 1</Title><Content>Article 1 body</Content></article>여기서 볼 수 있듯이, Accept 헤더를
appliation/xml로 설정해놓았기 때문에 우리의 요청이 XML 형식으로 응답받았다.
애플리케이션 테스트
테스트를 사용해서 Route Handler와 모델을 위한 설계를 만들었기 때문에, 기능이 예상대로 작동하도록 지속적으로 실행해야 한다. 이제 테스트를 실행하고 결과를 보자. 프로젝트 폴더에서 다음 명령어를 실행하자.
go test -v